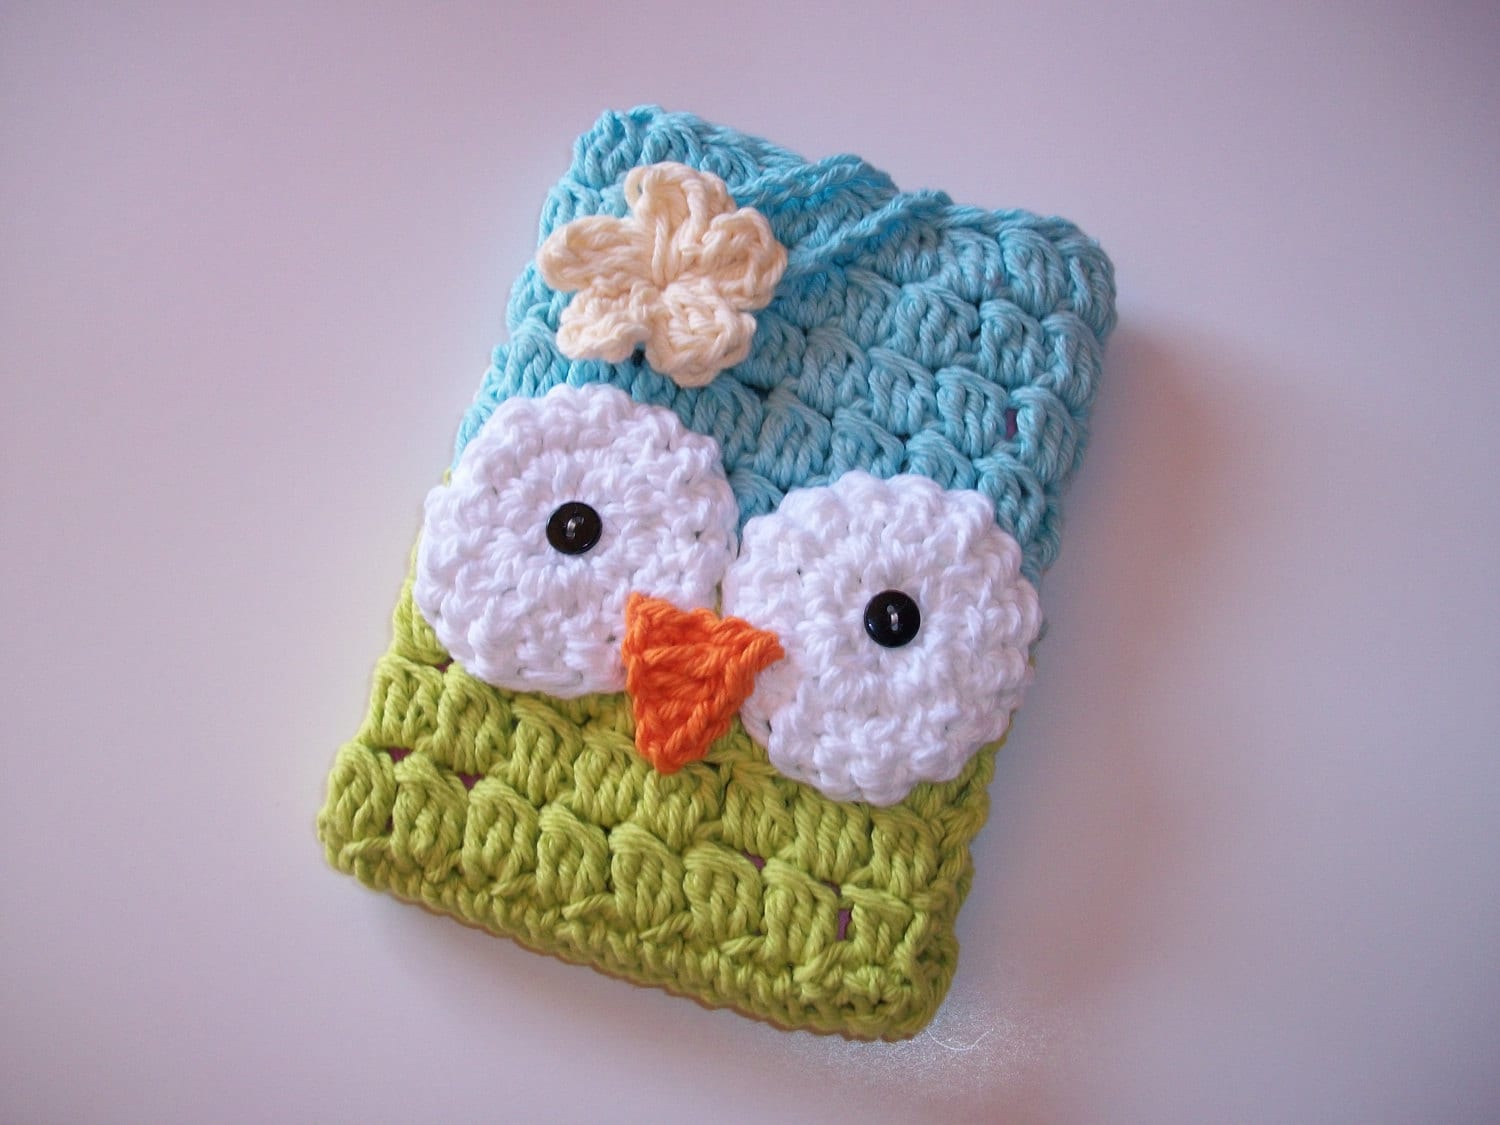
I found a really cute owl cover on etsy. I didn't want to buy the pattern or buy an already made owl cover so I made my own.
Here it is:

Red Heart With Love in the color Lettuce
Red Heart Super Saver Solids in Charcoal
Red Heart Super Saver Solids in White
Red Heart Super Saver Solids in Gold
Hook size: H
NOTE: This pattern is for a Kindle Fire. It's very easy to change the size of this, all you need to do is make your chain and make sure that it wraps around the whole width of the Kindle, we are going to be sewing the side and bottom together at the end. So this will be worked in 1 flat piece.
Row 1: Chain 38 with bottom color (Lettuce)
Row 2: DC in second ch from hook. *Sk 1 stitch. in next stitch, YO, pull through 2 loops, YO insert hook in same stitch, pull through 2 loops, YO, insert hook in same stitch, pull through 2. YO pull through all 4 loops on hook, ch 1.* Repeat across. In top of ch 2, DC crochet. Ch 2, turn.
Row 3: Ch 2, DC in same stitch. Sk 1 stitch, in next stitch, YO, pull through 2 loops, YO insert hook in same stitch, pull through 2 loops, YO, pull insert hook in same stitch, pull through 2. YO pull through all 4 loops on hook, ch 1.* Repeat across. In top of ch 2, DC crochet. Ch 2, turn.
Row 4 & 5- Repeat row 3. Fasten off and change color.
With next color (Charcoal) you are going to fasten it on;
Row 6: ch 2, DC in same stitch. Sk 1 stitch. in next stitch, YO, pull through 2 loops, YO insert hook in same stitch, pull through 2 loops, YO, pull insert hook in same stitch, pull through 2. YO pull through all 4 loops on hook, ch 1.* Repeat across. In top of ch 2, DC crochet. Ch 2, turn.
Row 7-12: Repeat row 6. Do NOT fasten off after row 12.
**Reminder, to work this to whatever height you want the cover to be, you can do more than 12 if you wish, or less.
Row 13: Ch 1, SC in next 9 stitches, ch 17, SC in the next stitch and the rest of the way across. Fasten off but leave a really long tale so you can go back and sew the side and bottom together.
**Note: I sewed my flower on where I wanted it first. That way I knew exactly where to put my chain. I put my flower in the top left hand corner of the front of the cover and have my chain coming down at an angle. I recommend putting your flower on first and then figuring out where your chain looks best at. Fold your cover in half and your chain is worked on the top of the BACK cover.
*I opted to sew the flower, eyes and nose on first. I then folded my cover inside out and sewed around the side and bottom, and then turned it right side out again. You can sew the sides and bottom and your face on last, that is totally up to you. Either way works.
Eyes (Make 2):In White:
Magic Ring, Chain 2
Round 1: 10 DC in magic ring, join at top of last DC, chain 2 (10)
Round 2: 2 DC in same stitch and in each stitch around, join to top of last DC, chain 1 (20)
Round 3: SC in same stitch, 2 SC in next, *SC, 2 SC in next, repeat from * around, join to first sc, fasten off leaving long tail to sew on.
Sew 3/4" black button in the center for the eyeballs.
Nose:
In Gold:
Chain 7
Slip stitch in 2nd chain from hook, SC, HDC, DC, DC, TC fasten off leaving long tail to sew on to cover.
Flower:
Hook size: I
Chain 4, join with the beginning chain.
*CH 2, 3 DC through the loop, CH 2, SL ST through the loop. Complete 5 times total from *.
**This is my first pattern so if you find any errors or you think there is an easier way to understand something, I will change the wording. All comments are welcome!
*You are welcome to use this pattern and sell it. All I ask is that credit be given back to me with a link, or a comment. =) I would love to see any of these finished, please leaves links in the comments! Thanks so much!!!
No comments:
Post a Comment